So I’ve had my friend’s laptop for some time and now that I’m through with school I can finally make good on my promise to attempt to finally solve his long standing audio problems. On his HP dv2500 laptop, the sound only works intermittently. We’ve tried all manner of driver fixes to no avail. Finally, one day I half joking suggested we just bypass the entire on-board audio. My idea at first was actually to make use of the on-board power amplifier and just ignore the audio codec IC. Ultimately I thought it wiser to just take everything on-board out of the equation and come up with a solution where I wire up the built-in speakers to a little audio amplifier board which is fed by a USB sound card.
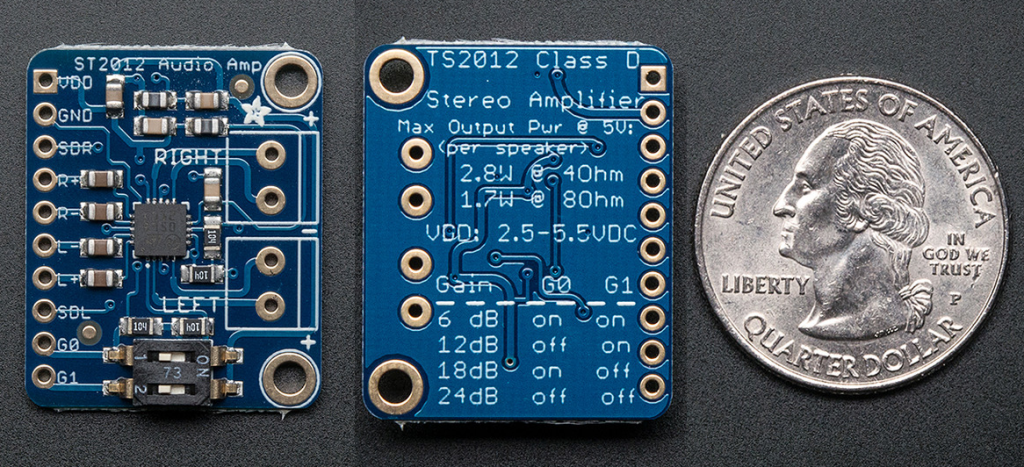
Adafruit TS2012 Audo Amplifier
The USB sound card I opted for is a small guy from Sabrent. They have since updated it, but that’s par for the course — these kind of products are always being revised.
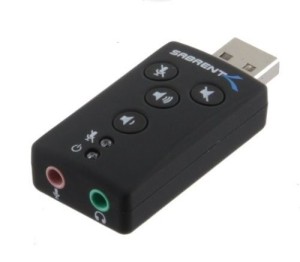
Sabrent USB-SBCV Sound Adapter
When I got the adapter I promptly removed the case to see just how much size I would be attempting to stuff into the cavity of a laptop. Basically what I am looking to do is remove the USB A connector and solder it directly to one of the ports on the motherboard. We could have elected to get a USB hub so he doesn’t lose a USB port but my customer said he didn’t really care about the lost port, more about having functional audio.
One issue I have certainly faced before is extending USB cables. You can read up a on USB cabling and signaling at Wikipedia though what you won’t really come away with from that article is the fact that USB is not really tolerant of hacky wiring jobs — it’s a sophisticated differential signaling scheme. Some care and dare I say engineering might be involved in this project.
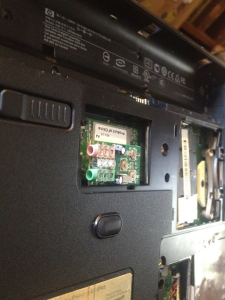
Despite being a tight fit, the WIFI area looks like the best location to stick the USB Sound Adapter, its roughly 100mm/4inch’s away from the nearest USB port and basically as close as I can get. Well, if we ditched the optical drive and stuck it in there that would be even closer but I doubt he’d want that! The added benefit of putting it here is the opposite side only has one USB port; hijacking that port would be inconvenient since only one side of the laptop would then have an available USB port.
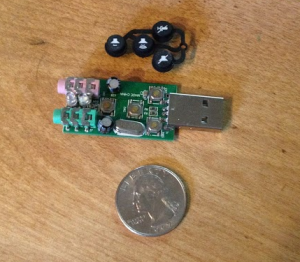
Dismantled Sabrent Sound Adapter
One of the interesting issues I’m going to have is what to do about the buttons. I wonder if taking them off the board and replacing them with leads to buttons attached to the laptop chassis somewhere will introduce noise?
Here is what the laptop looks like, half dismantled:
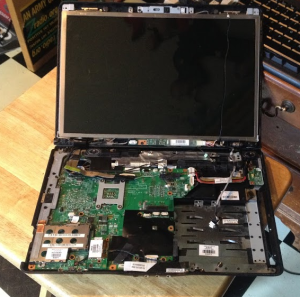
HP dv2500 Laptop
I was thinking to put my ‘added components’ in either the bluetooth area (empty except for the CMOS battery), RAM area, or Wifi area. Here is the underside:
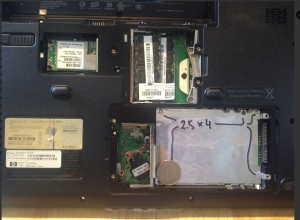
HP dv2500 underside
Fitting the sound adapter
If I do put the USB sound adapter in here, I’m going to have to get creative with the capacitors, LEDs, and 1/8th inch stereo jacks. There is not much room here.
For now, I am waiting on the Adafruit TS2012 audio amp to come in. I ordered two in the event that I nuke one in this project. I doubt I will though, so I’m planning on making a my own little cell-phone amp/speaker device out of the spare in the future.