Category: Linux Desktop

Persistent Server VNC

I have a home server I call a NAS but it also does some other stuff. Occasionally I find the need to do some GUI things, and I don’t want to be bothered with a physical keyboard and mouse as that’s quite inconvenient due to the physical setup. I require use of the real graphics card for this, so, using virtual desktops is not an option, so to that end I will use x11vnc since it shares existing X displays.

I suppose there is a more elegant solution to this problem but this is fine for me. I am running Debian 10, with the LXDE desktop environment. Bog standard Debian desktop install.

I’m going to make lightdm log me in my non-root user automatically:

root@nas:~# nano /etc/lightdm/lightdm.conf

Add your user under Seat:*

[Seat:*]
autologin-user= MadRush

~/.xsessionrc runs stuff as soon as you are logged in to X. It’s a perfect spot to make x11vnc start up:

MadRush@nas:~$ cat .xsessionrc 
/usr/bin/x11vnc -forever -display :0 -auth guess -rfbauth /home/MadRush/.vnc/passwd & disown

Okay so next time you log in, x11vnc will be started. And -forever means it will stay open after you disconnect. Going forward lightdm will automatically log you in, et voila, there’s your persistent x11vnc session. Restart lightdm:

root@nas:~# systemctl restart lightdm

Good to go! Now I can log in at the physical console if I want, and then pick up where I left off should I want to use VNC instead.

Foxit PDF Reader on Linux with Wine

I don’t very much like Evince or other FOSS PDF readers on Linux. I do however like using Foxit on windows. They do actually provide packages for Linux packages but there is a long standing rendering bug where everything is super stretched out vertically. There does not seem to be an solution to the bug in sight. However, while perusing the support forums someone mentioned they had good success using the Windows version in Wine. Ok! Fine.

I want this to be separate from the Wine root in my home directory so it is self contained and can be copied from one machine to another. I’m lazy.

mkdir -p /opt/foxitwine/wineroot
cd /opt/foxitwine/
<wget your foxit installer .exe in here>
WINEPREFIX=/opt/foxitwine/wineroot wine FoxitReader97_Setup_Prom_IS.exe

Now install Foxit Reader, I put it in c:\FoxitReader for brevity.

Thing is, you want this to integrate nicely with your Linux desktop, so, here’s a FoxitReaderWine.desktop file:

[Desktop Entry]
Name=Foxit Reader Wine
Comment=View pdf documents
Keywords=pdf;ppdf;
StartupNotify=true
Terminal=false
Type=Application
Categories=Application;Office;Viewer;X-Red-Hat-Base;
MimeType=application/pdf;application/ppdf;
Icon=FoxitReader
Exec=/usr/bin/env bash -c "printf 'z:%%q\\n' %F | WINEPREFIX='/opt/foxitwine/wineroot' xargs wine 'C:\\FoxitReader\\FoxitReader.exe'"

I was having an issue with getting the file argument successfully passed to wine so I mined this discussion for a handy solution.

mv FoxitReaderWine.desktop /usr/share/applications/

All done.

[Top]

Pick from different Java Versions when launching JNLP

Extenuating circumstances require me to run more than one version of Java JRE for work. Instead of using packages from the distro, I got the .tar.gz’s right from Oracle. I had to manually add the plugin to Firefox. Then, I extracted both JRE into /opt/java, added /opt/java to my path and made symlinks:


carl@carlworkstation:/opt/java$ ls -l
total 8
lrwxrwxrwx 1 carl carl 20 Jul 1 15:01 java -> jre1.7.0_80/bin/java
lrwxrwxrwx 1 carl carl 20 Jul 7 16:05 java7-java -> jre1.7.0_80/bin/java
lrwxrwxrwx 1 carl carl 22 Jul 7 16:49 java7-javaws -> jre1.7.0_80/bin/javaws
lrwxrwxrwx 1 carl carl 20 Jul 19 14:52 java8-java -> jre1.8.0_92/bin/java
lrwxrwxrwx 1 carl carl 22 Jul 7 16:06 java8-javaws -> jre1.8.0_92/bin/javaws
drwxr-xr-x 6 carl carl 4096 Apr 10 2015 jre1.7.0_80
drwxr-xr-x 6 carl carl 4096 Apr 1 00:17 jre1.8.0_92

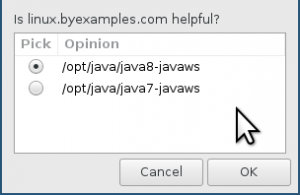
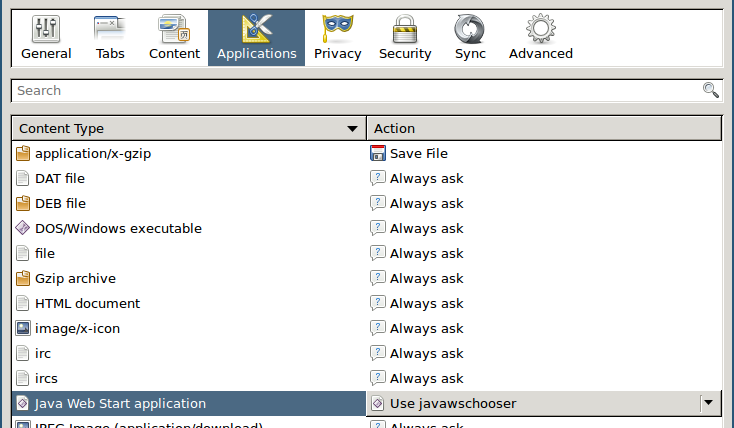
I wrote a little helper script which I use as the default application in Firefox for this, using zenity (actually I use Palemoon, but same difference).
firefox-java-web-start-application

#!/bin/bash
command=$(zenity --list --text "Is linux.byexamples.com helpful?" --radiolist \
--column "Pick" --column "Opinion" TRUE /opt/java/java8-javaws FALSE /opt/java/java7-javaws );
$command $1

Java Selector

Java Selector

[Top]

Password safe and GnuPG on Ubuntu 14.04

Once again here is how to verify and install Password safe. This is an update of an earlier post. Considering this software is guarding some of your most important secrets I see it worthwhile to verify the GnuPG signature. OS this time is Ubuntu 14.04 Trusty Tahr (Linux Mint 17.2 Rafaela).

Password safe

To verify the signature we need GnuPG.

  1. install gnupg

    $ sudo apt-get install gnupg

  2. import project administrator’s signing key (RSA)
    i. We’re going to import Rony Shapiro’s Password Safe Signing key. Go to https://pwsafe.org/contact.php click the link for “this public key”.
    ii. Save the page it gives you as pwsafe.key and strip out the HTML tags.
    iii. import the key

    $ gpg –import pwsafe.key
    gpg: key 5CCF8BB3: public key “Rony Shapiro (PasswordSafe Signing Key) <[email protected]>” imported
    gpg: Total number processed: 1
    gpg: imported: 1 (RSA: 1)
    gpg: no ultimately trusted keys found

    iiii. verify the key fingerprint against what is listed at the bottom of https://pwsafe.org/contact.php

    $ gpg –fingerprint
    /home/mrdesk/.gnupg/pubring.gpg
    ——————————-
    pub 2048R/5CCF8BB3 2011-02-10
    Key fingerprint = A703 C132 8EAB C7B2 0175 3BA3 9194 6451 5CCF 8BB3
    uid Rony Shapiro (PasswordSafe Signing Key) <[email protected]>
    sub 2048R/04B638E7 2011-02-10

  3. Download the package
    i. SourceForge (bleh) is the only place the .deb package is available. https://sourceforge.net/projects/passwordsafe/files/ Don’t be fooled, SourceForge lists 0.94BETA as the newest release, actually 0.97BETA is the newest as of the time of writing this article. In my case, passwordsafe-ubuntu-0.97BETA.amd64.deb. There are also .debs specific to debian, RPMs and source packages available.
    ii. Download the pakage signature. In my case, passwordsafe-ubuntu-0.97BETA.amd64.deb.sig
  4. Verify the Password Safe .deb package
    You need to have the .deb and the .sig file in the same directory.

    $ gpg –verify passwordsafe-ubuntu-0.97BETA.amd64.deb.sig gpg: Signature made Fri 09 Oct 2015 05:21:50 AM EDT using RSA key ID 5CCF8BB3
    gpg: Good signature from “Rony Shapiro (PasswordSafe Signing Key) <[email protected]>”
    gpg: WARNING: This key is not certified with a trusted signature!
    gpg: There is no indication that the signature belongs to the owner.
    Primary key fingerprint: A703 C132 8EAB C7B2 0175 3BA3 9194 6451 5CCF 8BB3

    Notice the fingerprint matches the one we verified earlier listed on http://pwsafe.org/contact.shtml — ok good!

  5. Go ahead and install

    $ sudo dpkg -i passwordsafe-ubuntu-0.97BETA.amd64.deb

  6. It will complain about dependencies for libwxgtk3.0-0, libxerces-c3.1, and libykpers-1-1. So, install your dependencies

    $ sudo apt-get -f install

Done! To verify your .deb has been installed:

$ dpkg –get-selections | grep passwordsafe
passwordsafe install

You can launch the password safe gui either by

$ pwsafe &

or by finding ‘Password Safe’ it in your launcher menu.

[Top]

Password Safe and GnuPG on Ubuntu 13.10

This was actually done on Linux Mint Petra but in this case its entirely Ubuntu compatible.  Yes, I know 13.10 is about to expire, don’t worry, I’ll fix this for 14.4 as soon as Linux Mint XFCE Qiana comes out and I put it on my desktop.

I am tired of resetting passwords, so the other day I set up Password Safe on my laptop.  It wasn’t hard but did take a little time so here is how to do it.  I took the extra few steps of verifying Password Safe’s signature because I take my passwords seriously.   As such, this guide steps through basics of GNU Privacy Guard (GnuPG).

Password safe

To verify the signature we need GnuPG.

  1. install gnupg

    $ sudo apt-get install gnupg

  2. import Rony Shapiro’s Password Safe Signing key (RSA)
    i. go to http://pwsafe.org/contact.shtml click the link for “this public key”.ii. Save the page it gives you as pwsafe.key and strip out the HTML tags.iii. import the key

    $ gpg –import pwsafe.key

  3. Verify the Password Safe .deb package

    $ gpg –verify passwordsafe-ubuntu-0.93BETA.amd64.deb.sig
    gpg: Signature made Fri 07 Feb 2014 01:07:50 PM EST using RSA key ID 5CCF8BB3
    gpg: Good signature from “Rony Shapiro (PasswordSafe Signing Key) <[email protected]>”
    gpg: WARNING: This key is not certified with a trusted signature!
    gpg: There is no indication that the signature belongs to the owner.
    Primary key fingerprint: A703 C132 8EAB C7B2 0175 3BA3 9194 6451 5CCF 8BB3

    Notice the fingerprint matches the one listed on http://pwsafe.org/contact.shtml — ok good!

  4. go ahead and install

    $ sudo dpkg -i passwordsafe-ubuntu-0.93BETA.amd64.deb

  5. it will complain about dependencies for libwxgtk2.8-0, libxerces-c3.1, and libykpers-1-1. So, install your dependencies

    $ sudo apt-get -f isntall

Done! To verify your .deb has been installed:

$ dpkg –get-selections | grep passwordsafe
passwordsafe install

You can launch the password safe gui either by

$ pwsafe &

or by finding ‘Password Safe’ it in your launcher menu.

, , , ,
[Top]